Intro to Software
This section presents a collection of commonly used software in our laboratory. It is worth noting that we do not typically develop or contribute to the code of these software, hence they are given a separate section from other tools such as Scilpy, Dipy, or Tractoflow.
To ensure efficient use of these software, we strongly recommend that you download/clone and compile/install them all in the same location, and keep track of when and how you performed the installations. These software are fundamental to most major projects in our lab, so you should be comfortable with their installation and basic usage. If not, at a minimum, you should understand what each tool is used for and how to obtain more information on its usage.
MI-Brain
MI-Brain is a Diffusion MRI and Tractography visualization software designed to help medical professionals and researchers look and explore their data. It provides many features and tools for processing and visualizing tractograms. The software was created by IMEKA (a Sherbrooke company for diffusion MRI analysis co-founded by Maxime Descoteaux & Pierre-Marc Jodoin).
Make sure to download the software from Github (here), read the wiki and watch the videos (linked below). To install it on Linux, unzip the folder where you want it, and add this to your .bashrc: alias MI-Brain="bash /PATH/TO/FOLDER/MI-Brain.sh".
If you are heavily using MI-Brain in your research, please cite:
Rheault, F., Houde, J-C., Goyette, N., Morency, F., Descoteaux, M., MI-Brain, a software to handle tractograms and perform interactive virtual dissection, ISMRM Diffusion study group workshop, Lisbon, 2016
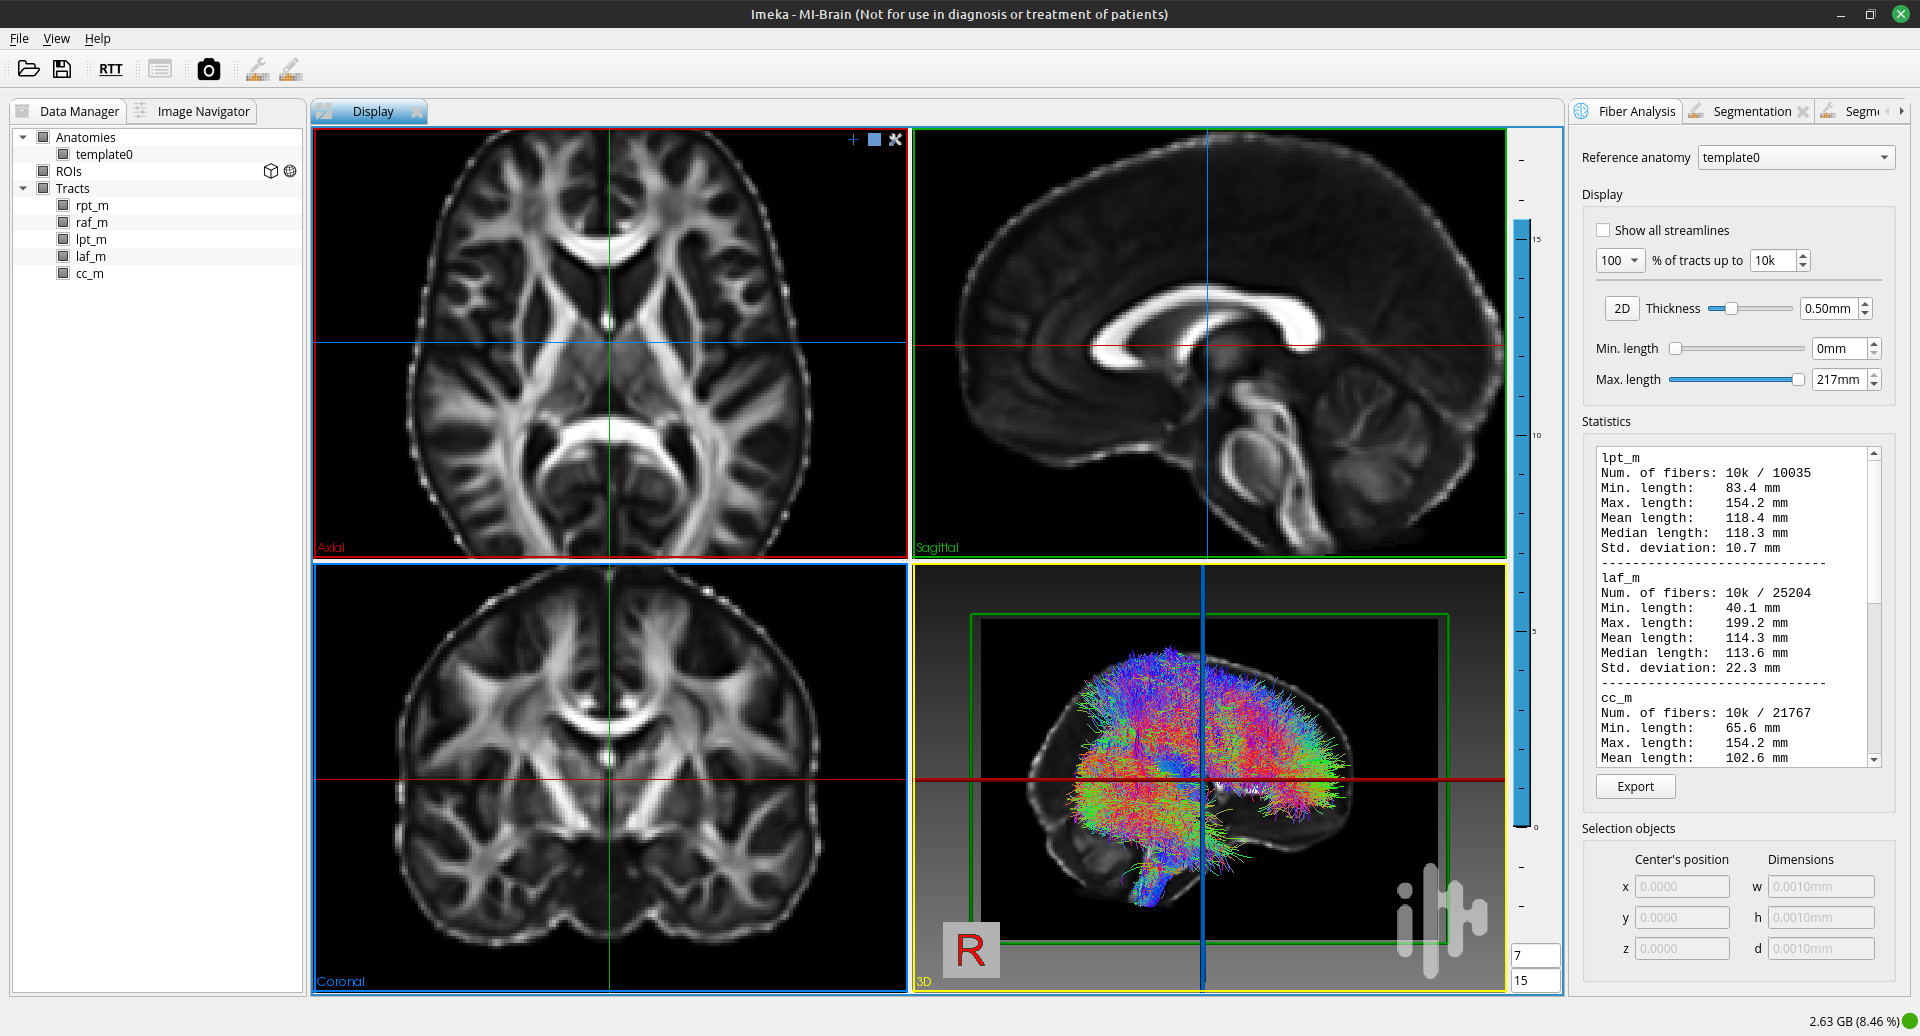
MI-Brain facilitates bundle segmentation and basic image/mask operations.
FSL
FSL (FMRIB Software Library) is an open-source software library for neuroimaging analysis. It provides a comprehensive suite of tools for processing, analyzing, and visualizing neuroimaging data (Structural, Functional and Diffusion MRI). It is widely used in academic and clinical research.
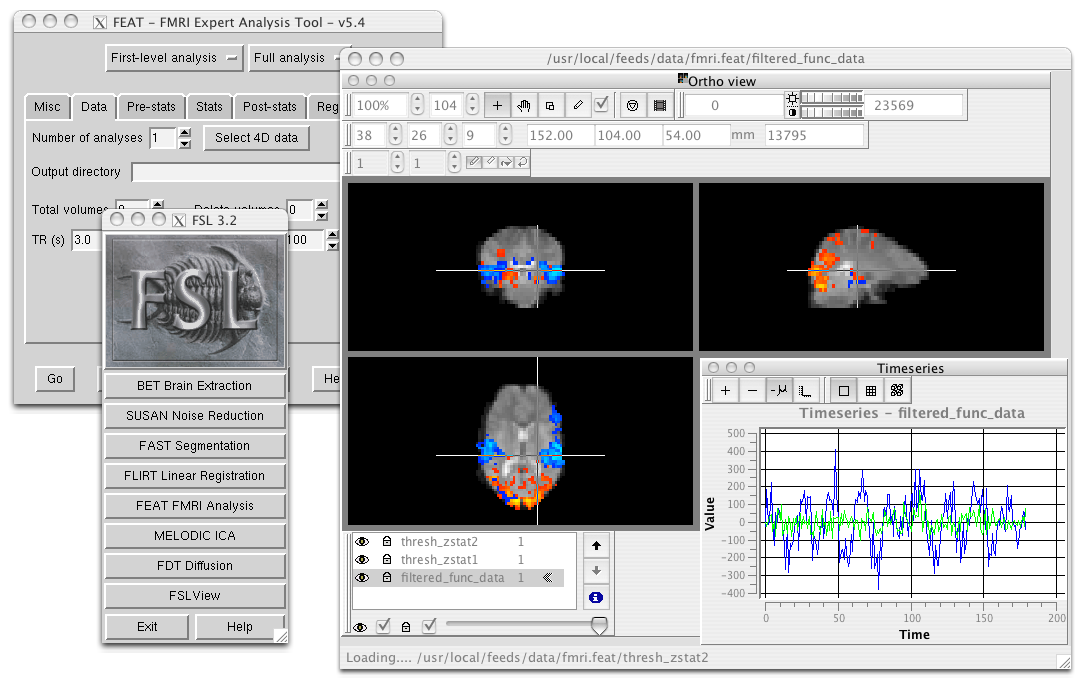
FSLeyes is used here to visualize fMRI data.
Useful Commands
Functional MRI
feat is a user-friendly FMRI analysis tool that includes data preprocessing, timeseries analysis, and group analysis using Bayesian techniques.
melodic is an FMRI analysis tool that uses Probabilistic Independent Component Analysis (PICA) to automatically estimate the number of signal and noise sources in the data and provide “p-values” for the output spatial maps.
Structural MRI
bet is the Brain Extraction Tool, which segments the brain from non-brain in structural and functional data and models skull and scalp surfaces.
fast is FMRIB’s Automated Segmentation Tool. It provides brain segmentation (into different tissue types) and bias field correction.
flirt is FMRIB’s Linear Image Registration Tool, which offers linear inter- and intra-modal registration.
fnirt is FMRIB’s NonLinear Image Registration Tool, which offers linear inter- and intra-modal registration.
siena is a structural brain change analysis tool used for estimating brain atrophy.
susan is a nonlinear noise reduction tool.
Diffusion MRI
bedpostx is a tool in FSL that uses Bayesian estimation with Markov Chain Monte Carlo sampling to model diffusion MRI signal as fiber orientation distributions and estimate diffusion parameters at each voxel for local modeling of diffusion parameters, including estimation of the number and orientation of fiber bundles.
probtrackx is a tool in FSL that performs tractography and connectivity-based segmentation using probabilistic tractography. It calculates the probability of connection between pairs of voxels in the brain by simulating diffusion-weighted MRI signal propagation along different possible fiber pathways to investigate the connectivity of different brain regions and segment the brain into functional networks based on connectivity patterns.
eddy is a tool that performs eddy current correction and motion correction for diffusion MRI data.
topup is a tool that corrects for susceptibility-induced distortions in diffusion MRI data.
xtract (cross-species tractography) is a tool that automatically extract a set of tracts in humans and macaques. It can also be used to define one’s own tractography protocols where all the user needs to do is to define a set of masks in standard space (e.g. MNI152).
TBSS is Tract-Based Spatial Statistics, part of FMRIB’s Diffusion Toolbox, which offers voxelwise analysis of multi-subject diffusion data.
Installation
Visit this website for download and install instructions as well as a general overview of tools available in the package (here)
You will have to download a Python file install (after accepting a license) and then install FSL (by executing the Python installer) (here)
It is common to add these lines to your .bashrc to make FSL easier to use;
# export FSLDIR=/PATH/TO/FSL
. ${FSLDIR}/etc/fslconf/fsl.sh
export PATH=${FSLDIR}/bin:${PATH}
Once installed, you should be able to type bet or fast to see the help display. fsleyes will launch the visualization tool.
ANTs
ANTs (Advanced Normalization Tools) is a powerful open-source software package for (medical) image analysis registration and segmentation. Extremely useful to create templates or extract cortical thickness. It is widely used in the field of neuroimaging. You can find information on their Github page or on their new documentation.
Useful Commands
antsRegistrationSyN.sh To compute registration (both linear and nonlinear). The main use is to bring any subject to MNI space or to co-registered different modalities of a single subject. Be careful, this version of the script use the correlation coefficient (CC) as a metric, meaning only correlated image intensites will work (T1w to T1w, T1w to FLAIR, or b0 to FMRI). This script runs in 10-20 minutes.
antsRegistrationSyNQuick.sh To compute registration (both linear and nonlinear). This version of the script use the Mutual Information (MI) as a metric, meaning statistical dependencies between image intensites will work (T1w to b0, FLAIR to PET, or T2w to CT). This script is much faster and is often use for to bring the T1w image into the diffusion space or for a quick registration (1 minute, lower quality) between image.
antsApplyTransforms To apply any transformations from ANTs to other images. Useful after registration of two images to transform masks and labels. Be sure to apply the transformation in the right order and use the right datatype (ask Francois Rheault about it).
antsMultivariateTemplateConstruction2.sh To build templates. Suppose you want to build a FA or T1 template of your aging brain population (or any population). We use ANTS for this. This script is fairly complex, you have to know a lot about the inner working of ANTs to obtain a good results (ask Francois Rheault about it)
antsBrainExtraction.sh To perform skull-stripping or brain extraction. This is done with registration and a template. It usually takes 20-30 minutes but can be more robust than FSL bet (we use it only for T1w, FLAIR). The template is available (here) (use the t1_template.nii.gz and t1_brain_probability_map.nii.gz)
N4BiasFieldCorrection To perform bias correction algorithm on T1w, which evaluate the spatial change in signal and ensure its uniformity.
antsAtroposN4.sh To segment WM-GM-CSF and to compute cortical thickness. This is a less common usage in the lab.
Installation
Visit this website for download and install instructions (here). ANTs use a pretty complex algorithm, so the command line is sometimes hard to understand at first, this. should help.
export ANTSPATH="/PATH/TO/ANTS/ants/build/install/bin"
export PATH=${ANTSPATH}:${PATH}
Once installed, you should be able to type antsRegistration to see the help display.
MRtrix
MRtrix is an open-source software package for diffusion MRI analysis and Tractography. It provides a suite of tools for processing, analyzing, and visualizing diffusion MRI data and streamlines. It is widely used in research and clinical applications. Visit this website for download and install instructions as well as a general overview of tools available in documentation
For a quick overview of commands you can look at their Getting Started (here) section. This webpage hosts an extensive tutorial of MRtrix3 from raw data to tractography (and more). We recommend trying this tutorial and finding analogous functions in Scilpy to reach the same end goals.
MRtrix is another set of tools to analyse diffusion data, much like Dipy and Scilpy. One main difference is that they use C++ whereas we use python, which may be slower but is easier to use open-source because of its readability?
Useful Commands
tckgen: a tool for tractography, generating streamlines based on the diffusion MRI data.
dwidenoise: a tool for removing noise from the diffusion MRI data.
mrconvert: a tool for converting between different file formats of MRI data. Changing strides and datatype. This is a useful tool to convert DICOM to NIFTI when other tools fail.
mrinfo: a tool for displaying information about an MRI dataset, such as image dimensions, voxel sizes, and data types.
mrview: a viewer for visualizing image and tractography file, fast and intuitive for fast sanity check as well as advanced rendering.
MRtrix pipeline is very similar in spirit to the Scilpy/Dipy and Tractoflow pipeline we implement at the SCIL. Both tools were created around the same time. Both are open source. Both are using a script approach.
Generally, MRtrix’s strong suit concerns the connectomics, voxel and fixel information (which is like a VBM or TBSS in the space of fODF fixels). See [Raffelt et al 2015, Mito et al 2018].
Scilpy/Dipy’s advantages: Scilpy/Dipy is written in python, which might be easier to read by the community than MRtrix’s C++. Its strong suit concerns streamlines and bundles instead of the voxels/fixels, with tools such as Recobundles, outlier rejection, tractometry and so on.
Installation
We recommand building MRtrix from source if you are on Linux (here). If you are on MacOS you can use brew install mrtrix3.
Be sure to install all dependencies, then follow all the installation step up to Set up MRtrix3 or add this line to your .bashrc: export PATH=~/PATH/TO/MRTRIX3/mrtrix3/bin:${PATH}
Once installed, you should be able to type dwi2fod to see the help display or mrview to launch the GUI.
Freesurfer
Freesurfer is an open-source software package for brain surface reconstruction and analysis. It provides a suite of tools for processing, analyzing, and visualizing brain surface data. It is widely used in research and clinical applications, it is often the tool of choice to generate cortical and/or subcortical parcellations. Visit this website for a general overview of tools available in the package.
Freesurfer is mostly known for its pipeline recon-all that starts from a T1w image and generates cortical parcellation, multiple meshes that represent the cortical surfaces.
- Freesurfer is much more than that, it contains a variety of tools:
Skull stripping, B1 bias field correction, and gray-white matter segmentation
Reconstruction of cortical surface models (gray-white boundary surface and pial surface)
Labeling of regions on the cortical surface, as well as subcortical brain structures
Nonlinear registration of the cortical surface of an individual with a stereotaxic atlas
Statistical analysis of group morphometry differences
This tutorial provides details on the typical output of their recon-all pipeline (along with FreeView, see below)
It also contains the TRACULA (TRActs Constrained by UnderLying Anatomy) tool. TRACULA performs the reconstruction of major white-matter pathways from dMRI data. As defined here: TRACULA uses prior knowledge on the relative positions of white-matter pathways with respect to their surrounding anatomical structures. Whereas the anatomical segmentation/parcellation tools use this type of neighborhood information to classify voxels in the volume or vertices on the surface, TRACULA uses it to produce tractography streamlines.

freeview is FreeSurfer built-in viewer, it supports tractography, meshes and 3D/4D images. It was made to work well with their pipeline outputs (perfect for QC).
Installation
Install instructions for release 7 are available (here). In the table shown, pick your OS (verify which Linux distribution) and pick either deb (or pkg on MacOS) or tar.gz.
If you picked the package option, you will have to install it using your OS package manager. If you picked the tar.gz option, you will have to use the following command: tar -zxpf freesurfer-linux-centos7_*.tar.gz
This will extract a folder in the current directory, so make sure to navigate to a directory for your software.
Then, add this line to your .bashrc:
export FREESURFER_HOME="/PATH/TO/FREESURFER/freesurfer"
. ${FREESURFER_HOME}/SetUpFreeSurfer.sh
Once installed, you should be able to type recon-all or mri_convert to see the help display.
MRIcroGL & dcm2niix
MRIcroGL is an open-source software package for the visualization of MRI data. It provides tools for visualizing MRI data in 2D and 3D. There are a lot of options for shaders, volume rendering, and automatic screenshots for research projects.
Visit this website for download and install instructions (here). You can download precompiled binaries for Linux/Windows/Mac. Their Github contains everything needed to compile everything from source.
From the same lab, you should install dcm2niix, it is a very robust and well-tested tool for DICOM to NIFTI conversion. Everything is also available on Github.
On MacOS brew install dcm2niix or on Linux sudo apt install dcm2niix.
If you have Conda, conda install -c conda-forge dcm2niix on Linux, MacOS or Windows.
Once installed, you should be able to type dcm2niix to see the help display or MRIcroGL to launch the GUI.